The right choice depends less on a marble’s showroom name than on where you will install it, how much moisture and traffic it will face, and whether the selected slabs work together. By comparing room use, finish, slab quality, installation requirements and maintenance, you can decide where Wonder White Marble earns its place—and where porcelain, engineered stone or another surface is safer.
Key takeaways
- Use Wonder White marble for feature walls and low-abrasion rooms.
- Treat kitchens, wet areas, stairs and entrances as higher-risk uses.
- Compare slabs for shade, veining, cracks, thickness and surface finish.
- Specify sealing, slope, joints, edge details and replacement slabs before installation.
Which Areas of a Pune Home Suit Wonder White Marble?
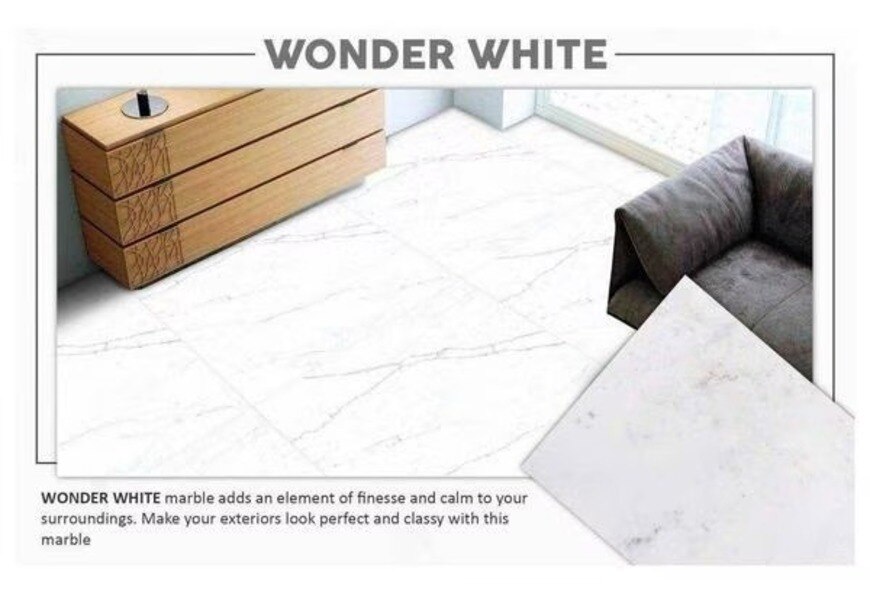
Wonder White Marble for homes in Pune suits low-abrasion surfaces best. Use it confidently on feature walls and carefully selected living-room or bedroom floors; treat kitchens, wet areas, stairs and entrances as higher-risk applications because staining, slipping, chipping or replacement becomes costly.
| Application | Suitability | Main reason and decision point |
|---|---|---|
| Living-room or bedroom floor | Suitable with planning | Wonder White Marble for flooring handles normal foot traffic, but furniture movement, pets and tracked-in grit can scratch polished surfaces. Honed marble hides fine scratches better. |
| Entrance or balcony floor | Use cautiously | Monsoon footwear and grit increase slip and abrasion risk. Choose a less smooth finish, use mats and remove grit promptly. |
| Stair treads | Conditional | Every tread receives repeated edge impact and replacement is difficult. Inspect fissures, specify a slip-conscious finish and avoid visibly weak pieces. |
| Kitchen countertop | Usually a poor choice | Oil, turmeric, lemon, vinegar and hot cookware create staining, etching or repair problems on a high-consequence surface. |
| Bathroom vanity top | Conditional | Water is manageable, but cosmetics, hair dye and acidic cleaners stain or etch. Seal the stone and detail the splashback and edges. |
| Shower niche or wet wall | Conditional | Moisture enters fissures and joints; replacement is disruptive. Approve only after checking absorption, backing and adhesive compatibility. |
| Wall cladding or feature panel | Strong fit | Low abrasion and no foot traffic let dramatic veining perform well, provided the wall can support the stone. |
| Kitchen backsplash | Suitable with care | It avoids floor abrasion, but cooking oils and acidic splashes demand prompt cleaning and a tested sealer. |
Inspect both slab faces for mesh, resin fills and moisture-sensitive treatment. Use a white, natural-stone-compatible adhesive only after confirming the manufacturer’s substrate, bed-thickness and moisture requirements; grey mortar can show through translucent areas.
How Will Pune’s Monsoon and Daily Use Affect the Surface?
A polished floor at a Pune entrance can become a slip concern during monsoon: wet footwear leaves a smooth film, while tracked-in grit scratches the surface under shoes and furniture. Humidity does not damage sound marble by itself, but poor drying, dusty corners and unclean mats make marks more persistent.
Use absorbent entrance mats and remove grit promptly.
- Wonder White Marble for flooring: polished finish looks bright but shows scratches, shoe marks, dust and uneven loss of gloss. Honed finish hides fine scratches better, yet oil and dark liquid marks stand out and busy entrances need more frequent cleaning.
- Wonder White Marble for interiors: a honed or polished wall receives little abrasion, so appearance is easier to control than on a floor. Near windows, strong sunlight makes dust, glare and patchy gloss more noticeable; check the sealer manufacturer’s advice before exposing treated surfaces to direct sun.
- Wet-area surfaces: a less smooth finish improves grip compared with polished stone, but it does not make a shower floor automatically slip-proof. Keep water from pooling and confirm the finish is intended for floors.
Lemon juice, vinegar, bathroom descalers and some cement-removal products can etch white calcitic marble. Sealer reduces absorption; it cannot prevent chemical dulling. Before handover, obtain written care instructions for the exact finish: a neutral-pH stone cleaner, soft tools, spill-response steps and approved sealer guidance. Never use abrasive powders or unapproved impregnators.
How Should You Compare Wonder White Marble Slab Options?
Approve the actual slabs, not a 300-mm showroom sample. “Wonder White” is a commercial name, so slabs can differ in origin, mineral composition, porosity, veining and treatment. Ask for quarry origin, batch details, technical data sheet, slab thickness and net usable dimensions.
- Inspect every slab under clean, even lighting, from the face and rear. Record shade, grey or yellow undertones, vein direction, natural fissures, resin-filled pits, mesh backing and any repaired areas.
- Mark defects on the cutting drawing. A fissure through a sink cut-out may be manageable; one crossing a stair tread or countertop edge can turn into a failure.
- Calculate slab count from the layout, not room area. Subtract unusable margins and defects, then allow for matching veins, edge profiles and replacement pieces.
- Confirm whether resin or mesh requires a compatible adhesive. A generic cement adhesive can contribute to staining, debonding or curling when the backing or repair system is unsuitable.
- Lay the slabs dry with the proposed grout, joinery, lighting and edge profile. This is the reliable wonder white marble selection method, especially for adjacent slabs and bookmatched panels.
| Layout | Advantage | Planning consequence |
|---|---|---|
| Straight directional | Simple cutting and calmer appearance | Rotate slabs only if vein flow remains acceptable |
| Bookmatch | Creates a mirrored feature | Requires paired slabs and increases matching waste |
| Mixed orientation | Uses offcuts efficiently | Veins may change direction at joints |
Photograph the approved layout and label each slab before cutting. That record prevents a visually different replacement from being accepted later.
What Must Be Specified Before Installation?
Specify the application, slab thickness, support system and finish before ordering; “Wonder White marble” alone is not an installation specification. Use this schedule:
1. For Wonder White marble for flooring, state the slab size, measured thickness, polished or honed finish, full-bed installation, substrate flatness tolerance and perimeter and field movement joints. Require a white, non-staining adhesive approved for natural stone, the substrate and bed thickness; grey mortar can show through translucent areas. Voids beneath large slabs invite cracking.
2. For walls and feature panels, specify panel thickness, maximum size, rear mesh or resin treatment, mechanical anchors or backing where needed, joint width and edge finish. Wonder White marble for interiors may contain reinforcement or moisture-sensitive repairs, so inspect the rear and obtain adhesive compatibility confirmation before installation.
3. For countertops and vanity tops, specify thickness, front edge profile, sink cut-out reinforcement, cabinet support, backsplash joint and sealing method. For kitchen worktops, ask for stain and acid-resistance information; marble can mark from lemon juice, vinegar and harsh cleaners.
4. For stairs, specify tread thickness, nosing projection, riser thickness, anti-slip treatment, visible edge polishing and support beneath every tread. Do not rely on adhesive alone for unsupported overhangs.
5. For bathrooms, shower niches and other wet areas, specify falls, waterproofing, movement joints, slip-resistant finish and compatible grout. Request test reports for water absorption and flexural strength, plus the installer’s written method for moisture-sensitive slabs.
What Evidence Should Support Your Final Decision?
Approve the stone only after evidence from your project, not a showroom photograph. Treat wonder white marble selection as a decision about the actual slabs, intended use and maintenance burden.
1. Demand a dry layout or full-size mock-up with the proposed grout, joinery, edge profile and cabinet colours. View it in daylight, warm evening light and bright white lighting; each can change the apparent undertone.
2. Inspect every intended slab under clean, even light. Check the face and rear for fissures, resin fills, mesh backing, curling and moisture-sensitive treatment. A 300-mm sample cannot reveal full-slab variation or vein matching.
3. Ask for the quarry or origin, batch number, technical data sheet, test results and written maintenance instructions. Confirm cleaning products, sealing frequency, stain response and adhesive compatibility instead of accepting “Wonder White” as a universal grade.
4. For wonder white marble for homes in pune, record the consequence of failure in each location. Keep replaceable floors and feature walls separate from kitchen worktops, shower niches, vanity tops and stair treads, where replacement is disruptive or safety-critical.
5. Compare alternatives for the difficult application: granite, quartzite or porcelain may better suit wet, abrasive or acid-exposed areas. Judge wonder white marble for interiors with the same lighting and mock-up, not by appearance alone.
6. Ask RK GRANITE to identify the batch, usable slab area, expected wastage, repair history and a compatible installation system before signing approval. Get those answers in writing.
Related product
 | Marble RK Granite presents premium Wonder White Marble in Pune, renowned for its pristine white base with subtle grey veins, offering a timeless and elegant... View product → |
Frequently asked questions
Which areas of a Pune home suit Wonder White Marble?
Feature walls and carefully selected living rooms or bedrooms suit Wonder White marble best. Kitchens, wet areas, stairs and entrances carry higher staining, slipping, chipping or replacement risks.
How can Pune’s monsoon and daily use affect Wonder White Marble?
Monsoon moisture and tracked-in grit increase slip and staining risks. Daily abrasion can also dull polished surfaces, so entrances and wet areas need particular caution.
How should you compare Wonder White marble slab options?
Compare slabs for background shade, veining, fissures, cracks, thickness, finish, size and visual consistency. Inspect the actual slabs reserved for your project rather than relying only on photographs.
What must you specify before installing Wonder White Marble?
Specify the finish, laying pattern, grout colour, joint width, edge profile, substrate preparation, sealing, wet-area slope and the process for approving slab placement.
What evidence should support your final marble decision?
Use physical slab inspection, a room-sized dry layout, written details of the selected slabs and installation method, and a sample test for staining, slip and finish appearance.
Keywords